Bridge Networking with Qemu and Libvirt
By Prithvi Vishak
Created December 17th, 2021
Backstory
My dad's work requires him to use Windows. The catch here, though, is that he's often dealing with multiple conflicting versions of software, and in general cluttering up a single system with it all (dependency hell for you package maintainers out there). Despite (because of?) having used Windows for so long, he took to Linux quite nicely, and worked in Windows VMs in VirtualBox. He also tried out Libvirt with Qemu, and liked the speed it offered relative to VirtualBox.
My dad likes his VMs on our local network. VirtualBox made bridging to a local network a trivial task, with just a switch or two to flip. That didn't seem to be the case with Libvirt and virt-manager. Eventually, he ended up switching back to Windows for another project, but he's recently expressed interest in switching back to Linux, this time using Libvirt with bridge networking. He assigned me the task of getting it to work, since I already used Libvirt for my (modest) VM needs.
Network bridging seems to only cooperate with physical ethernet interfaces. My dad and I use WiFi. In my surfings of the interwebs, I discovered that some networking whizzes work around this limitation by creating dummy ethernet interface thingamabobs and having those hooked up to their physical wireless interface.
Yes, I too had a hard time following that, but then came across routing, which apparently allows for packets to be routed through the host to VMs. As I understand it, it is different from bridging in that the router is simply told that certain IP addresses belong to our VMs, and that packets meant for them must be sent to our host, which will know to forward them. This works over a wireless connection. Well, long (and I mean really long) story short, that didn't work for me either (probably because I don't fully understand it yet, and the tutorials are all older than Gangam Style). If I make progress on this front, I'll update this article.
Recently, I chanced upon Adam Williamson's wonderful article on getting bridging working quickly and easily from a GUI (because I'm a normie). This article describes the exact same process, with some screenshots for my reference, along with a few minor changes adjusting for modern versions of apps.
What I did
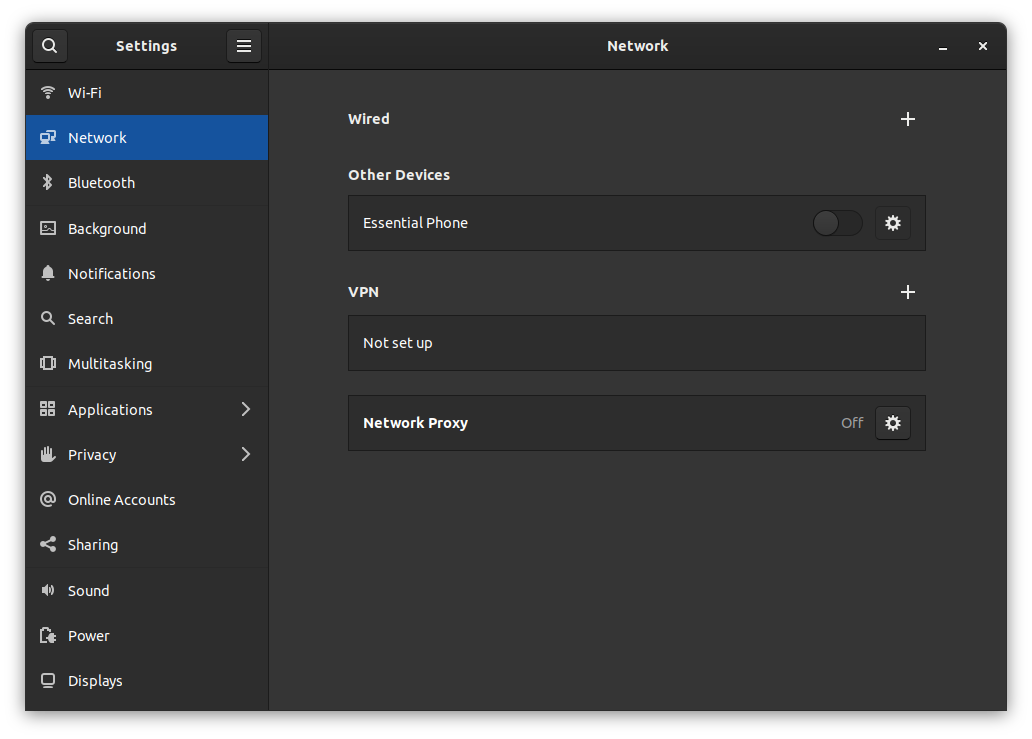
I decided to work around the wired-only limitation of bridges by digging out an old router, configuring it as an extender, placing it at my desk, and plugging my computer into it via ethernet (through a USB dongle - thanks a lot, Dell). Next, I disabled the automatically created ethernet profile in Settings under the Networks tab.

For the grandpas out there
Then, I installed the NetworkManager Connections Editor package (called NetworkManager-connection-editor on openSUSE). Weirdly, the ability to create bridges seems to have been removed from the GNOME settings app, as per other articles I went through.
I can see why GNOME get so much heat from users for arbitrarily removing features.
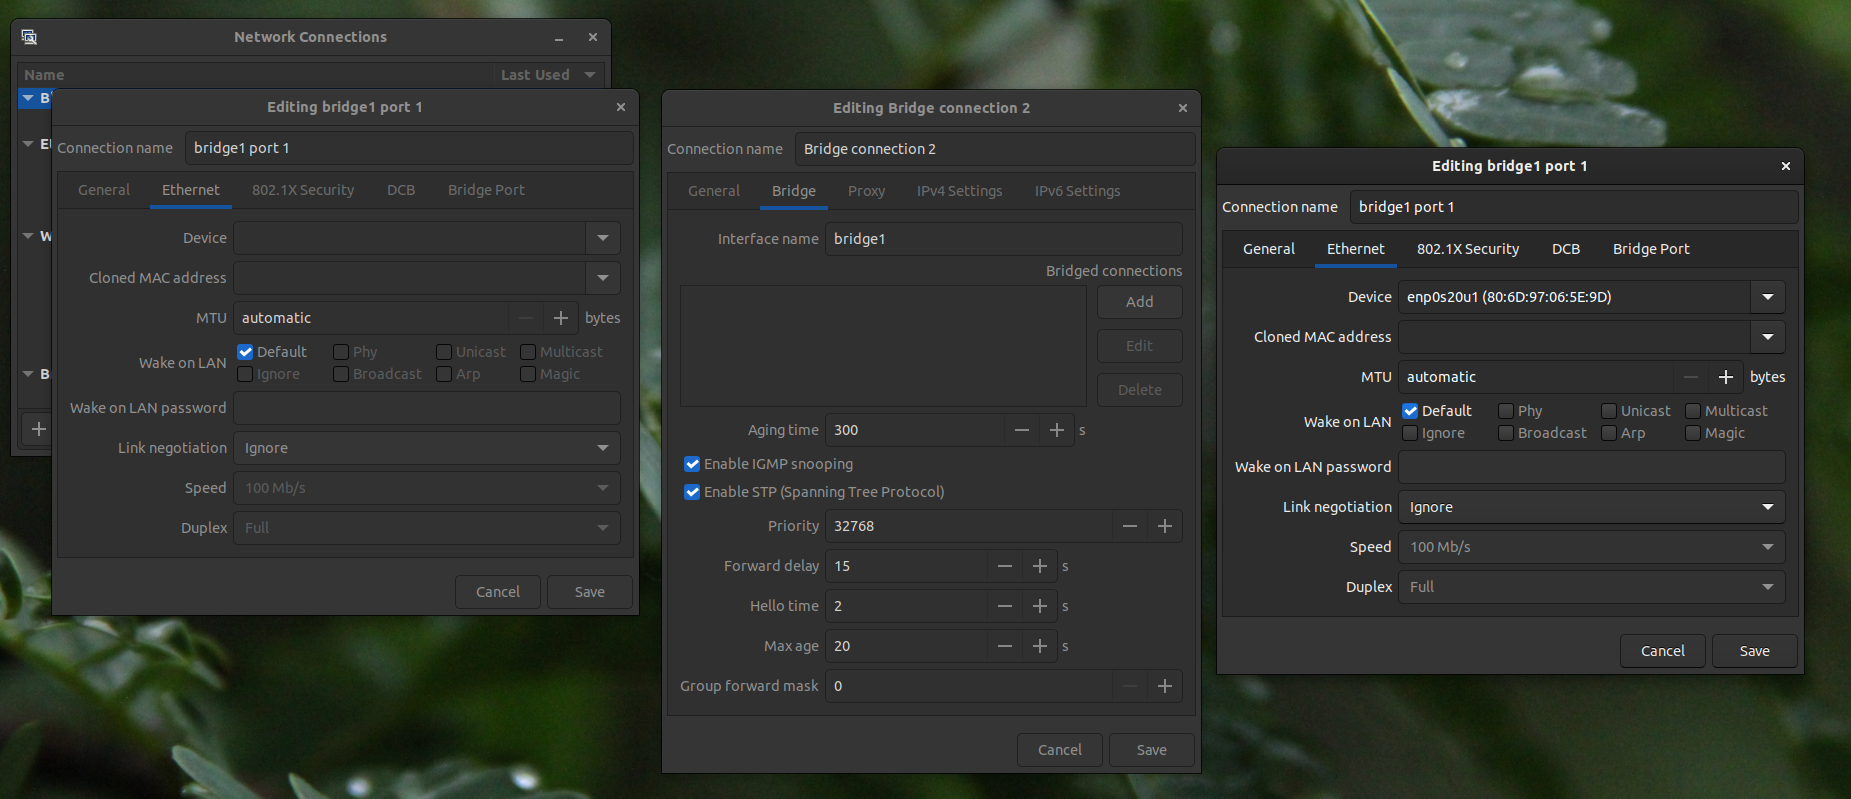
Anyway, I launched the app (naturally called "Advanced Network Configuration" instead of "Connection Editor"), clicked +, chose to create a Bridge, then hit Create. I use DHCP for IP address allocation on my home network. If you don't, you may want to edit things in the IPV4 section. Other than that, no changes needed to be made in the current window (I mean, if you use IPV6, you probably don't need to be reading this article).
Under the Bridge pane, I hit Add in the Bridged Connections section, and chose Ethernet in the dropdown. In the Ethernet pane, select your physical ethernet device in the drop-down.

Left to right in chronological order
Hitting Save, Create, and whatever other buttons I needed to make things final, I didn't see a new connection show up in the Settings app's Networks section, as described in the article linked above. For whatever reason, there doesn't seem to be a way to activate a connection in the "Advanced" Network Connections tool, so I went to the terminal, and ran this:
~> nmcli con show
NAME                     UUID                                  TYPE       DEVICE
wlp6s0                   6a2352b6-b29f-4c8a-a45c-b235235accf0  wifi       wlp6s0
Bridge connection 1      03504422-7d40-45b8-9f4f-564a23452354  bridge     bridge0
bridge0 port 1           08332b0b-c7f2-4638-9449-17e98235423c  ethernet   --
...
~> sudo nmcli con up 08332b0b-c7f2-4638-9449-17e98235423c
The first command was for getting the UUID of the new bridge's port that our host's ethernet card plugs into (not the bridge itself). The second was to activate the connection. Unlike what my reference article describes, I still don't see an entry in the GNOME Settings app.
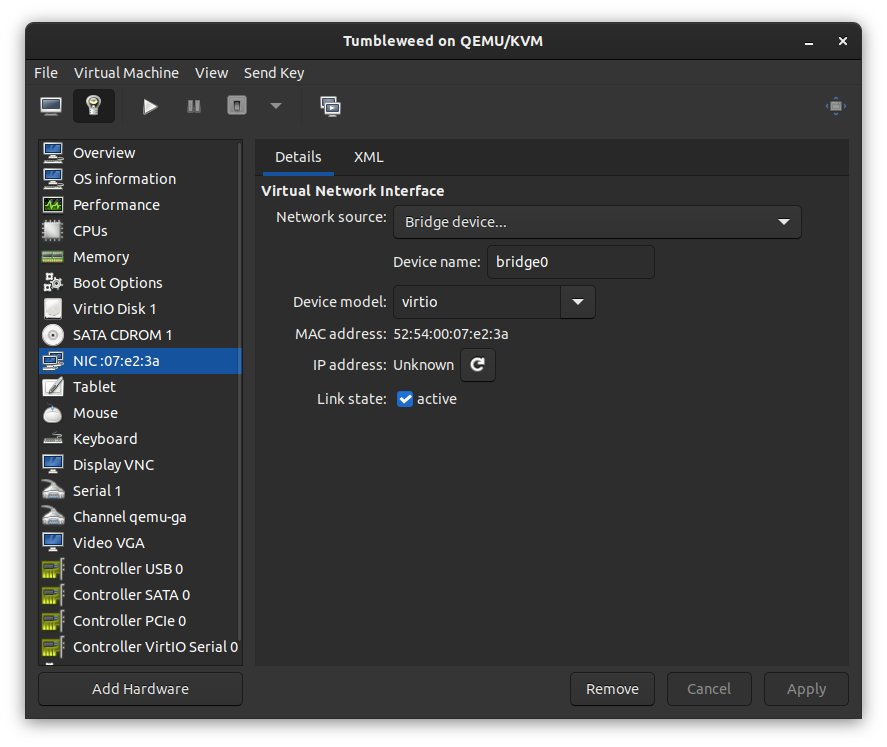
Well, that's about it. In my VM's configuration, I set the NIC to also plug into the new bridge, and I was on my way!

Now all I need to do is convince my mom to let me run a cable from the router to get rid of the extender... the hardest part of this whole endeavor.